Want a cup of coffee & cookies? ☕🍪 We use cookies to improve your user experience on this website. By choosing to visit our website, you are accepting our Terms Of Service andPrivacy Policy.
Psst! This page contains affiliate links, which means that I may earn a small commission, at no cost to you, if you make a purchase through a link. By doing so, you’re helping me pay my biz bills (and to drink coffee; lots of coffee, & to keep buying design books and art supplies, which I love). Learn more in my Affiliate Disclosure.
If you want to build and grow your email list, you need to create a landing page to allow your audience to sign up to your list. Sometimes you may offer an incentive, like a free resource that you created, or a coupon code for your online shop.
You can build that landing page on your own website (and use an embedded form), or you can design that opt-in page completely on Flodesk, my favorite email marketing platform (it’s the one that I choose to manage my email list).
If you sign up with my affiliate link or with my discount code SOULFULGIRLS, you get 25% off in your monthly or yearly email marketing subscription on Flodesk during your first year.
FLODESK BONUS: If you purchase a Flodesk subscription with my affiliate link or my affiliate code, I’ll also give you one of my Flodesk link in bio templates of your choice for free (there are five different styles: Authors, Bold, Dreamy, Mystical, and Sophia). Value: $21.
To claim this bonus, you’ll have to send me a screenshot of your purchase to hi@soulfulgirls.com and tell me which Flodesk template you want. I’ll give you a 100% coupon code to get that template for free.
This isn’t valid for free trials or the free plan. You have to purchase a Flodesk subscription to qualify for this bonus.
In this blog post, I’m going to teach you, step by step, how to design your own full page form in Flodesk. So even if you don’t have a website yet, you can start building your email list on Flodesk.
If you’re already inside the Flodesk platform, you can create a signup page by going to Forms – New Forms.
Step 2: Click on full page form
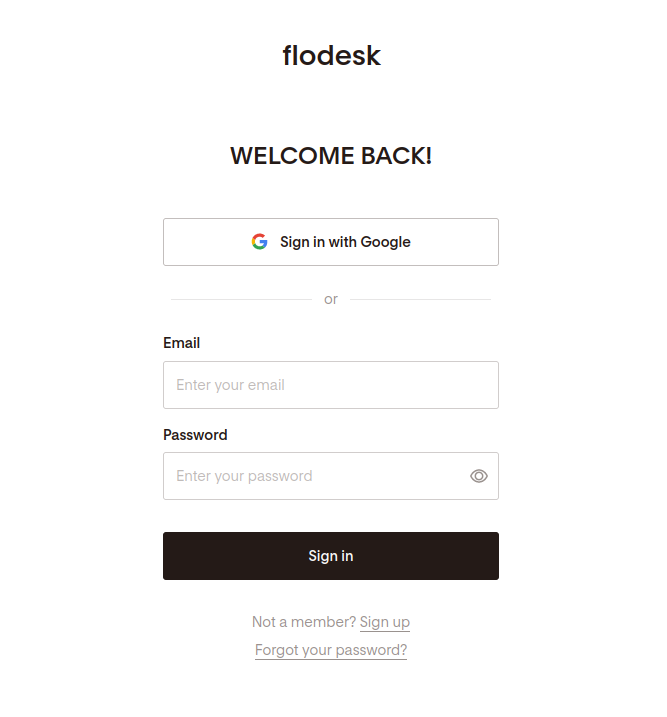
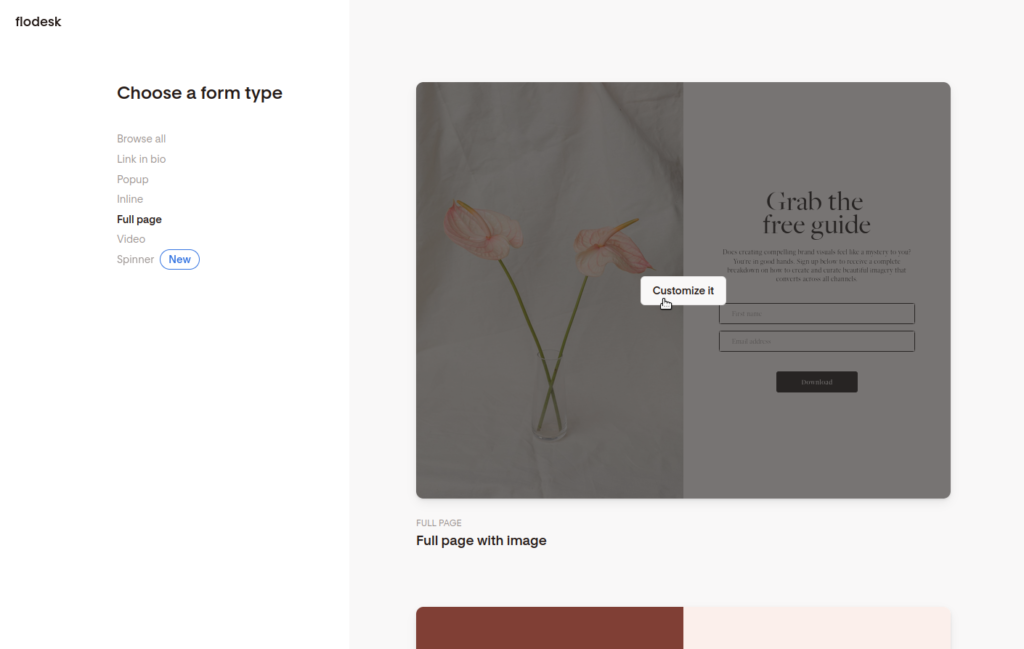
Once you login to Flodesk, you will find a page with different options to choose a template. Click on “Full page”.
Step 3: Choose a full page form template in Flodesk
You can browse the full page form templates and choose the one that you like the most. Then click on “Customize it”.
In this case, I’m going to select the template “Full page with image”. But you can use any of the full page form templates available in Flodesk and follow this tutorial to modify it.
Step 4: Choose a segment
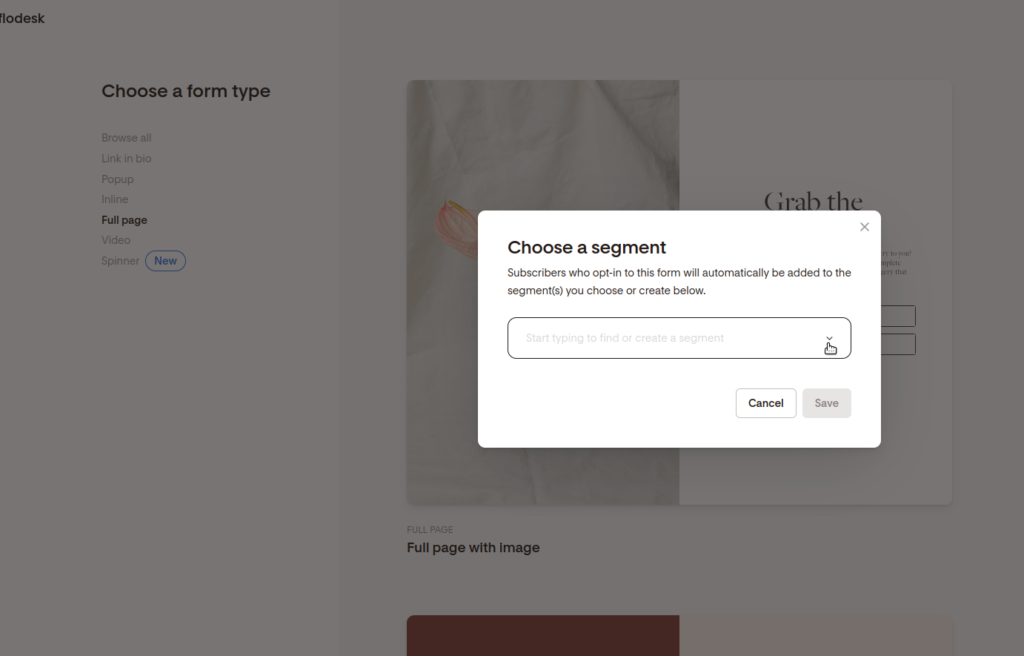
You need to select a segment that will be connected to the sign up form on this page.
Once you pick a segment, click on “Save”.
Step 5: Add a background color to your full page form
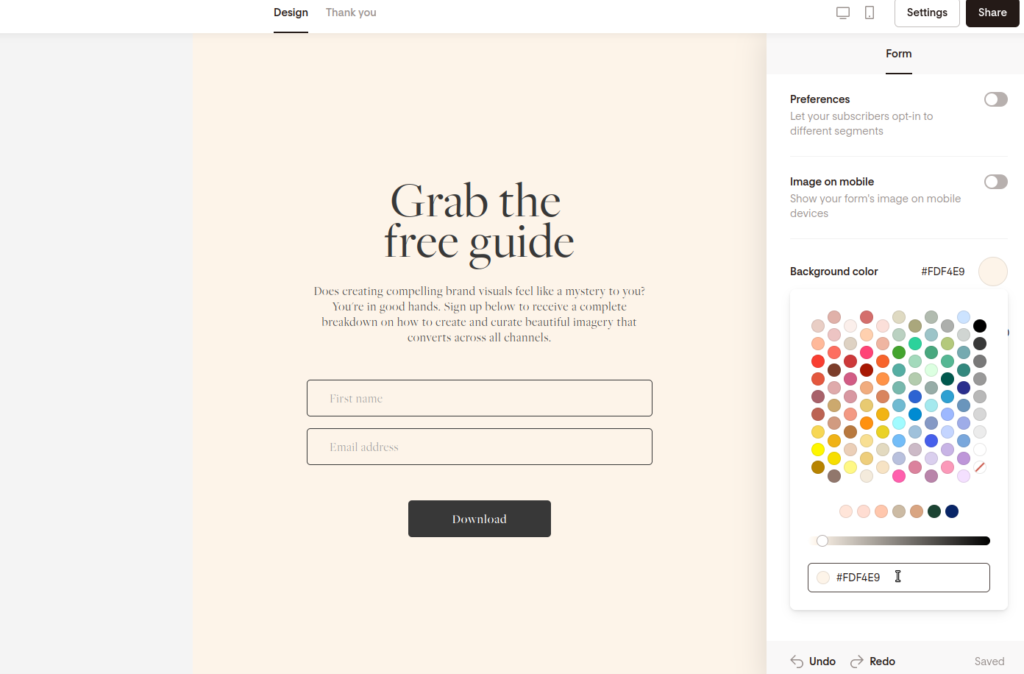
Click on the blank space or canvas around the full page form (without clicking on any block) to get access to the form menu.
Click on “background color” to modify the color of your full page form.
Step 6: Write a title for your free resource
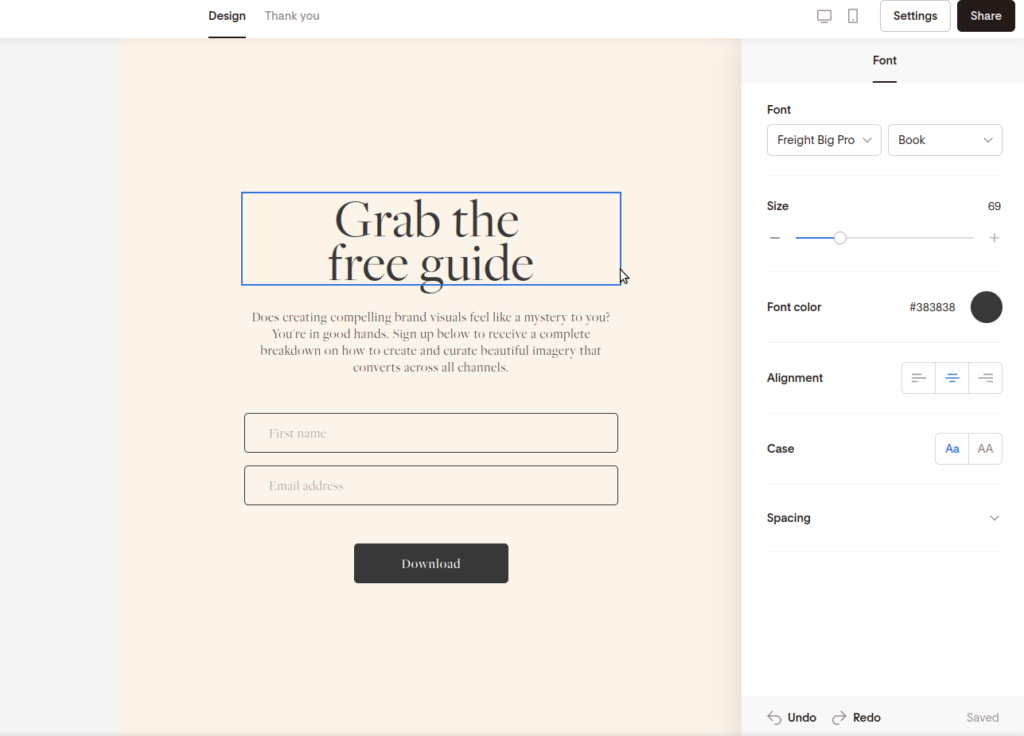
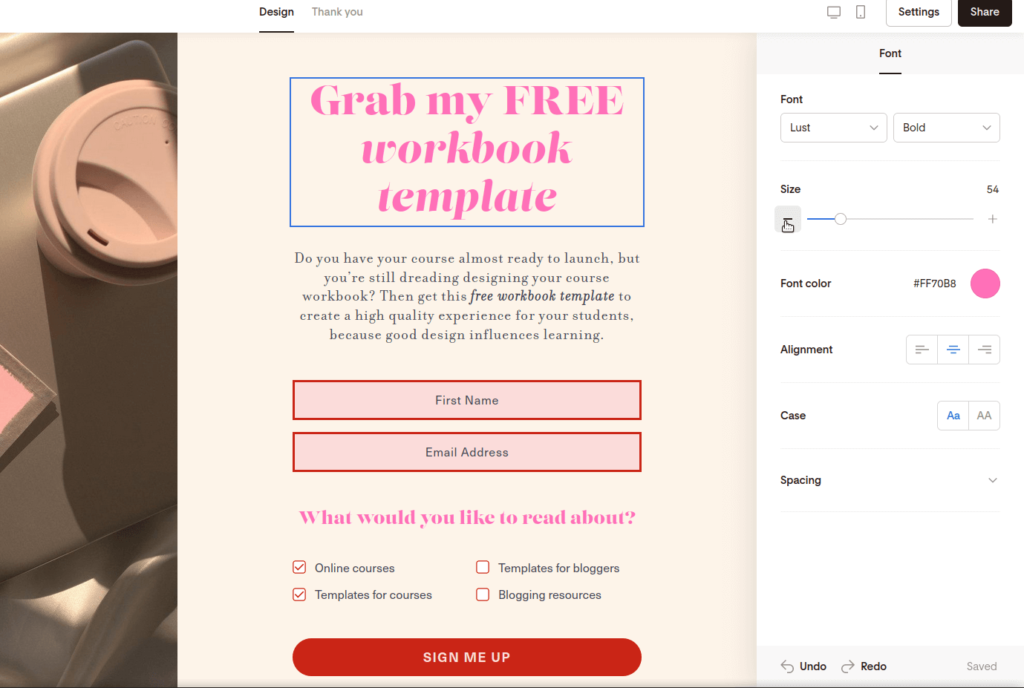
Click on the title of the free resource section to change it. A new menu will appear on the right side. You’ll be able to modify the font, size, color, alignment, case, and spacing.
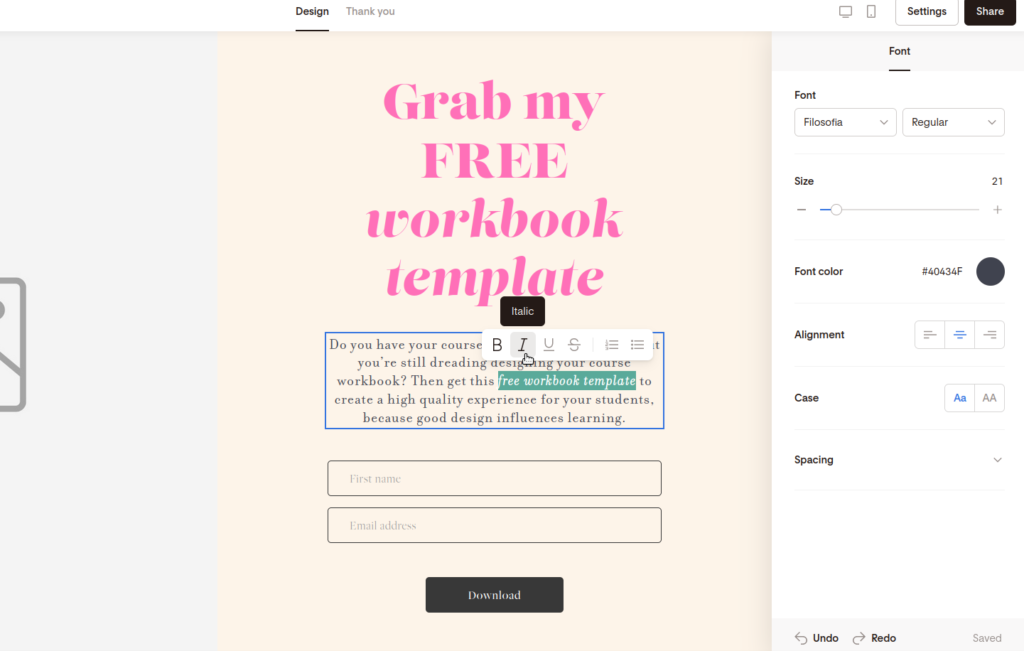
If you’d like to add italics or bold to a couple of words in the title, highlight the text and you’ll get a new menu with additional options.
Step 7: Write a description of your free resource
Click on the description of the free resource to modify it. A new menu will appear on the right side. You’ll be able to modify the font, size, color, alignment, case, and spacing.
Write or paste a description of your free resource. If you’d like to add italics or bold to a couple of words or a sentence, highlight the text and you’ll find a new menu with additional options.
Step 8: Customize the subscription form
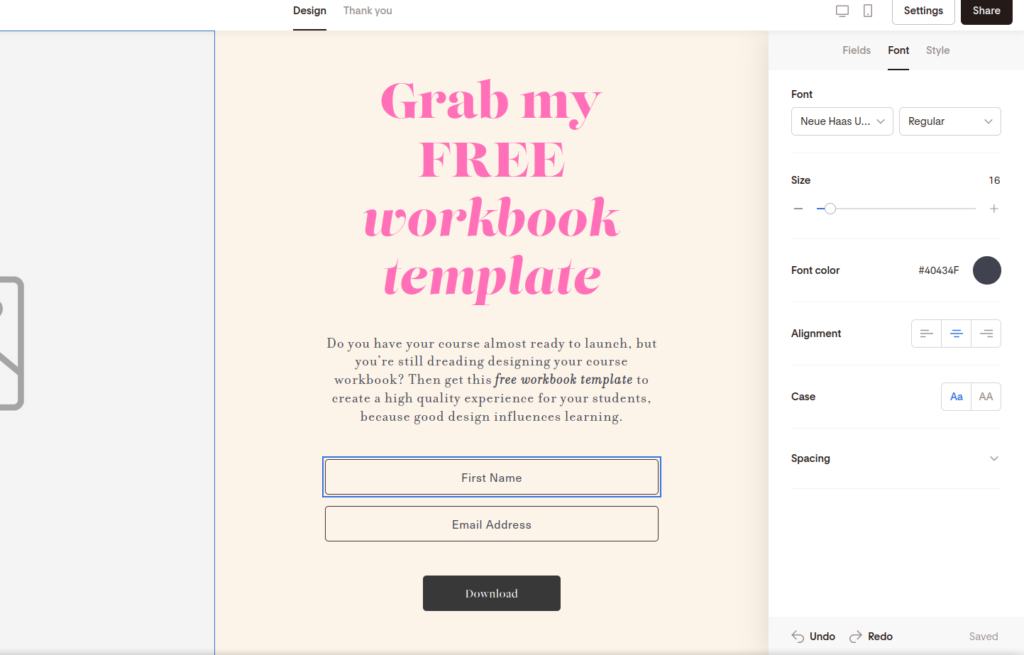
Click on the name field in the subscription form. You’ll find a menu with field, font, and style options.
We’ll customize the field menu first, where you can add or modify fields.
You can add the surname field or a custom field. This is where you’ll decide if the name field is required.
In this case, I’m going to leave the form as it is, with first name and email address.
If you want to change the order of the fields, click on the six dots on the left side of one of the fields and move it up or down.
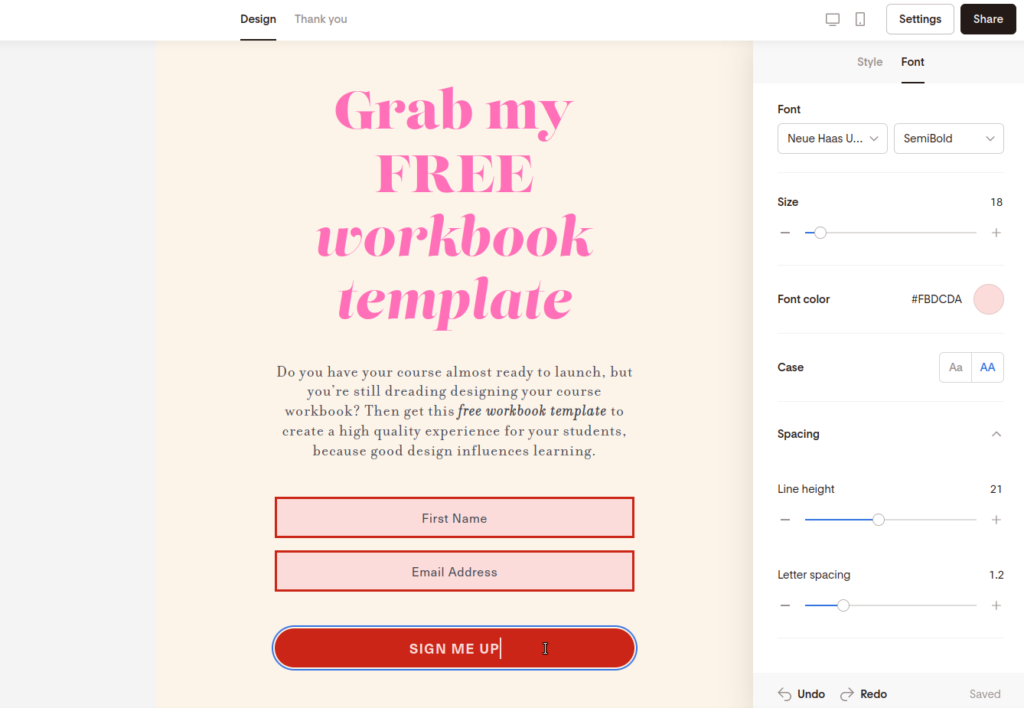
Now click on the font menu, where you’ll be able to customize the font, size, color, alignment, case, and spacing.
I’m going to select a different font than the ones that I chose for the title and description of the free resource.
In the style menu, you’ll be able to customize the style of the form field, fill and border color, border thickness, and field sizing.
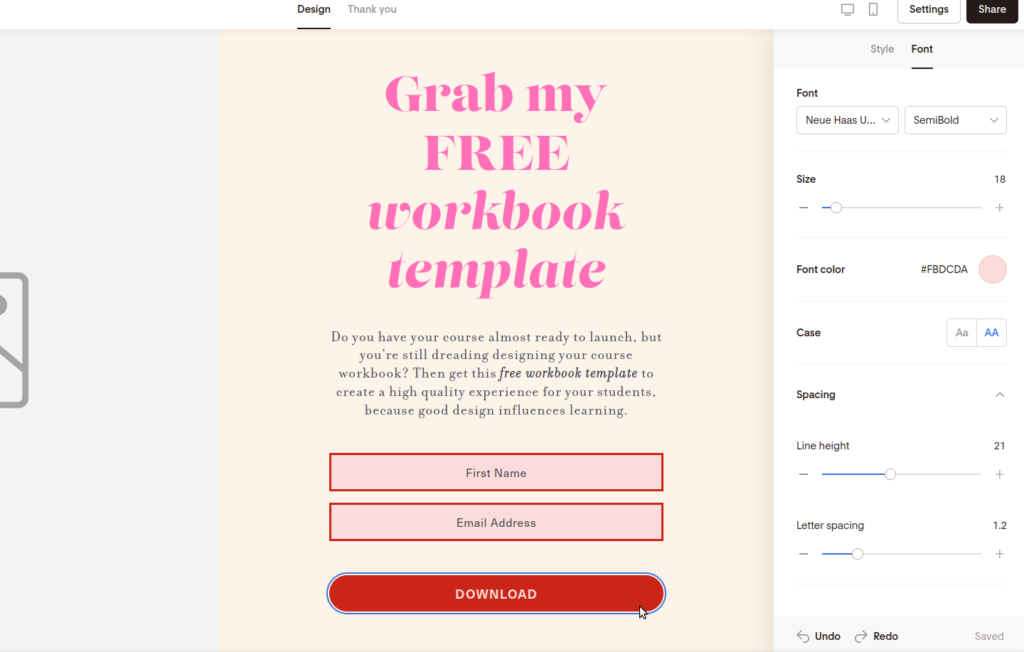
Next, click on the form button. You’ll find a menu with style and font options.
In the style menu, you’ll be able to change the style of the button, fill and border colors, border thickness, and button size.
In the font menu, you’ll be able to modify the font, size, color, alignment, case, and spacing.
If you’d like to customize the text of the button, highlight the text and then write to replace it.
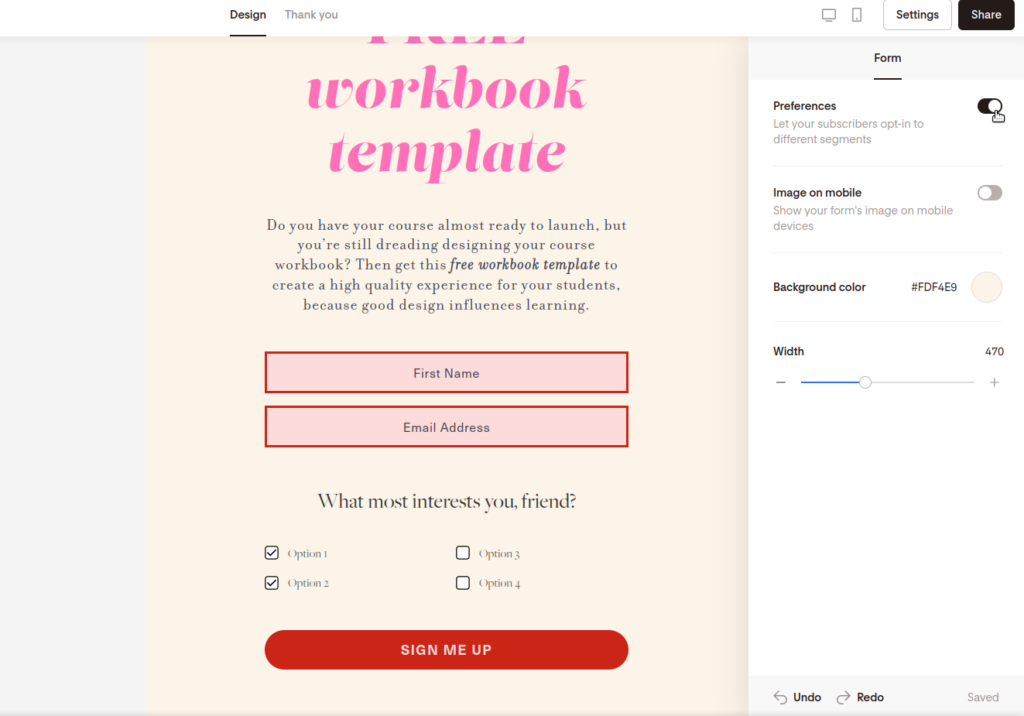
If you’d like to give your email subscribers the opportunity to select their preferences when they subscribe to your list, you can activate this section in the form menu.
Click on the blank space or canvas around the full page form (without clicking on any block) to get access to the form menu.
Then activate “Preferences”.
Click on the title of the subscribers preferences section to change the text (by highlighting it and writing your own text) and customize the font.
Next, click on any subscriber preference option and modify the name of the preference and the segment associated with it in the menu on the right side of the screen.
You can add or delete options, and reorganize the order by clicking on the six dots on the left side of any preference.
In the font menu, change the font, color, and spacing of the subscriber preferences options.
Lastly, change the style of the preference (checkbox, color, and spacing).
Step 10: Add an image to your full page form
Click on the image block to get access to a menu where you’ll be able to upload an image (recommended file size 2000 x 2000 px).
If you’d like to show this image when your form is viewed on mobile devices, click on the blank space or canvas around the full page form (without clicking on any block) to get access to the form menu.
Then activate “Image on mobile”.
Step 11: Preview your full page form on desktop and mobile
If you’d like to preview your form in desktop or mobile view, click on the desktop or mobile icons at the top of the screen.
Once you’re done, click on “Back to editing” on the left side of the screen.
Thanks to previewing the form, I realized that the font size of the title is too big, and if I reduce the font size, all the content of the form will be viewed on desktop without scrolling.
Now I’ll preview the full form page again on both desktop and mobile to make sure that the page looks good.
Go back and forth between editing your full page form and previewing it on desktop and mobile until you like the way your form looks.
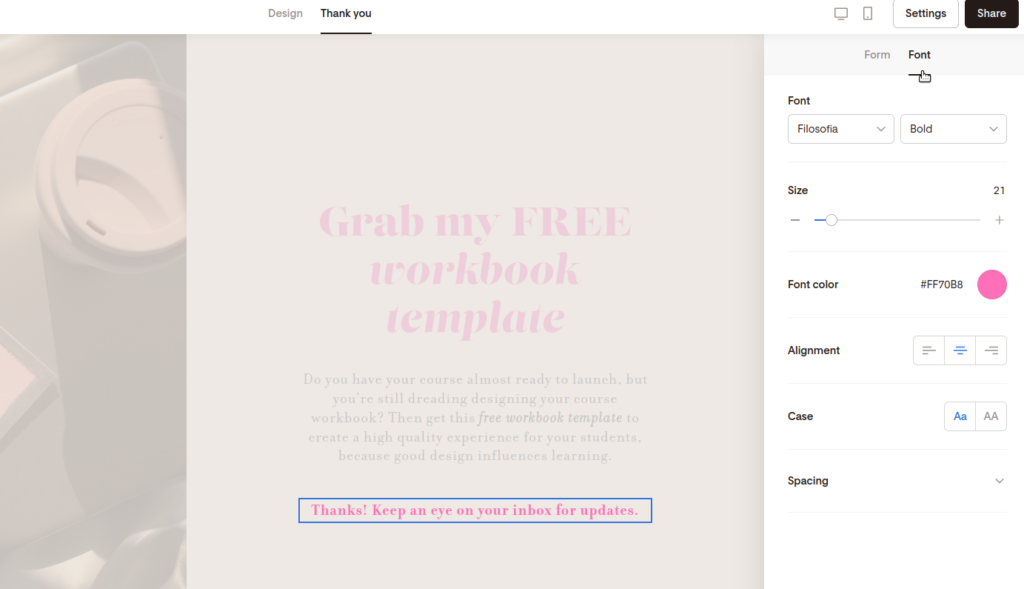
Step 12: Customize the thank you message
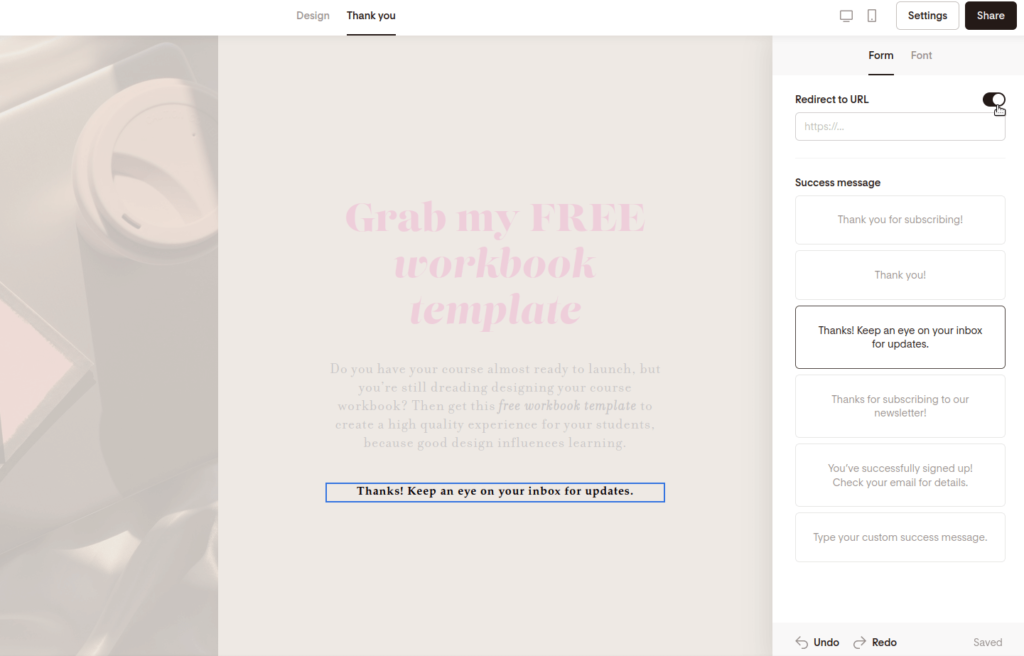
Click on “Thank you”, at the top of the screen, to modify the thank you message after people sign up to your list through your full page form.
You can redirect to a URL with your custom thank you page, choose a success message or write a custom one, or both.
In my case, I always select one message from Flodesk (that displays immediately after someone signs up to my list), and also a page redirect to a custom thank you page with a special offer for subscribers only.
If you want to customize the style of the font in the thank you message, click on the font menu.
Step 13: Modify the settings of the full page form
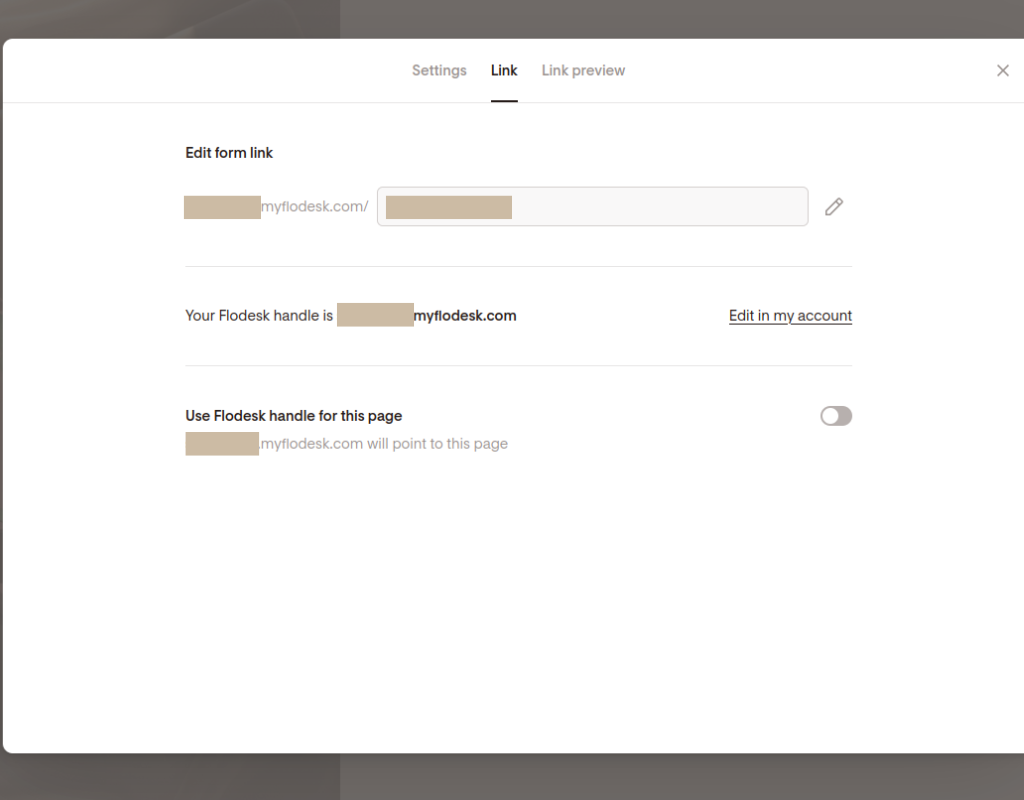
Click on “Settings”, at the top of the page, to modify the link name and the link preview when you share your full page form.
In the “Settings” menu, you can select double opt-in, choose to be notified when subscribers opt-in to your freebie through this full page form, and modify the segment associated with this free resource.
In the “Link” menu, you can edit the form link, and select between using your business handle or Flodesk’s handle.
In the “Link preview” menu, you can upload an image (which will be displayed when you share this form) and modify the title and description of your full page form. The recommended file size of this image is 2000 x 2000 px.
Step 14: Share your full page form
Click on “Share”, at the top of the page, and copy the link of your full page form.
Then share this link in your favorite social media platforms and your website. And that’s it! You did it! 🥳
I provide female entrepreneurs, like you, beautiful and soulful images, Flodesk templates, and Canva templates that they can use in their personal brands.
I also write resource tutorials and reviews to make your blogging life easier, and have fun designing and selling printable planners.